CLUES Pictures Feature
How to Prepare,
Upload, and Display Your Picture in CLUES
Important Information:
Once you have uploaded the picture, you will need to wait
about 15 minutes before you can display your picture in CLUES
Allow 20 - 30 minutes to complete the process of preparing and uploading your picture to CLUES.
Preparing your picture for upload (using Paint)
Uploading Your Picture to CLUES
Preparing
your picture for upload (using Paint)
Pictures must meet the following requirements:
- .jpg/.jpeg files
- If your picture has a copyright, the owner must not object to its use in CLUES.
- Square in shape
- Business appropriate
- Passport-like
- Approximately 100x100 pixels
- Less than 19 K in size (check file properties)
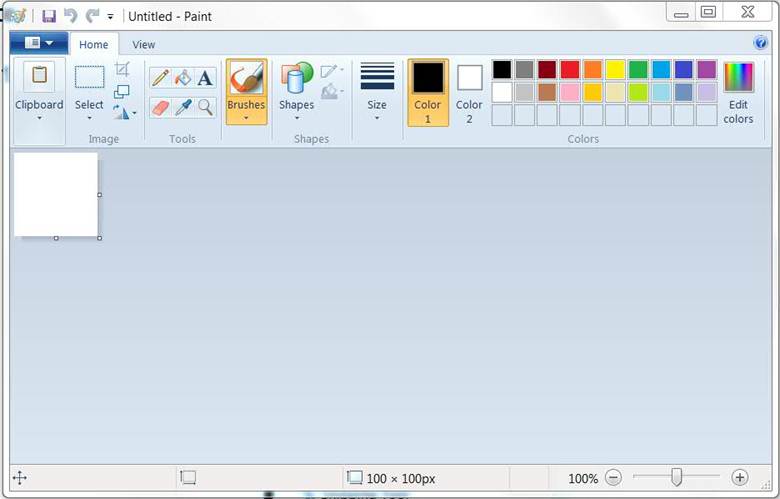
1. Open Paint.
a. Click Windows Search > Type in Paint to open Paint App.
2.
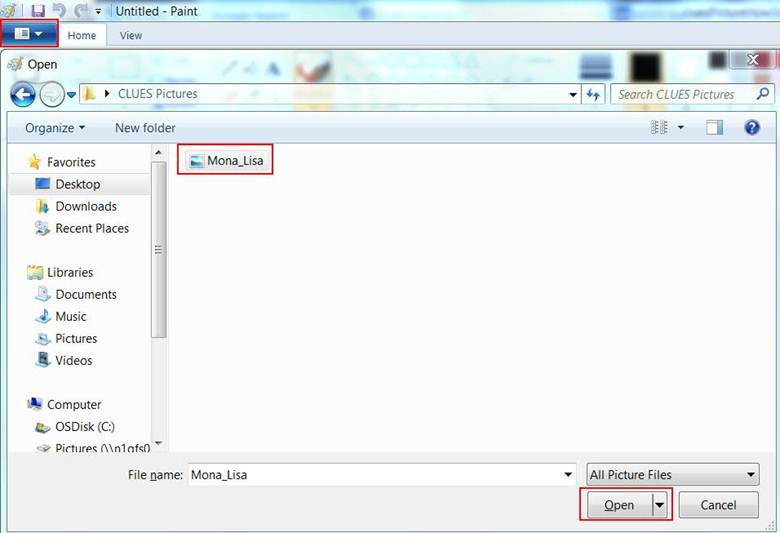
Open the
picture to be uploaded.
a. Click the pulldown menu just below the save button
b. Click ‘Open’
c. Use the navigation on the left hand side to browse to the folder that contains your picture.
d. Select your picture.
e.
Click
‘Open’.
3. Crop your picture if you wish.
a. Note the status bar at the bottom of Photo Editor. If the picture is square (width and height pixel count are the same, for example 500 x 500 px), go to Step 4. Resize your picture.
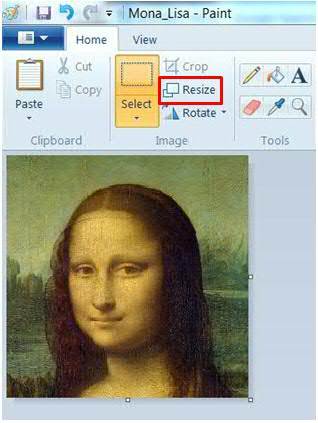
b. Click
the ‘Select tool’ ![]() .
.
c.
Click on your picture to select it.
d.
Hold down the mouse button and drag the dashed
square to frame the area you want to use as your picture.
e. Note the size of the framed area in the status bar. You may need to maximize your screen to see it. If the numbers are equal, the selection is square.
i. If the numbers are not equal, you can undo your selection by clicking the ‘Undo’ button next to the ‘Save’ button. Then use the steps above to select a portion of your picture again while watching the picture size. Both values should be greater than 100 and close to equal as possible. Any difference between the values is acceptable but the closer the width and height are to equal the more square the picture will be.
f. Once you are satisfied with the image contained in the framed area, click ‘Crop’.
4.
Resize
your original or cropped picture (if you chose to crop it).
a. Click ‘Resize’.
The Resize screen displays.
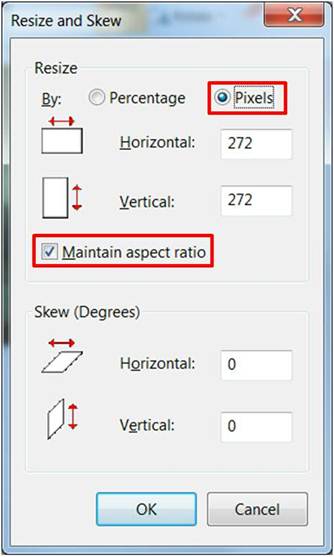
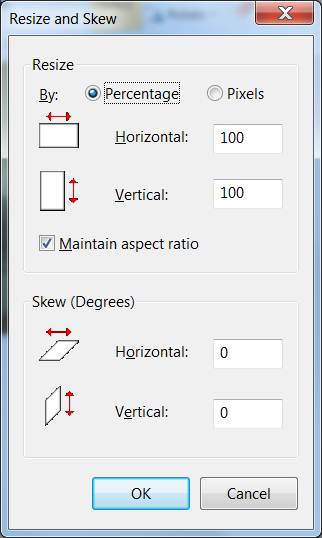
b. Change ‘By:’ to Pixels.
c. Check ‘Maintain Aspect Ratio’ (if it is unchecked).
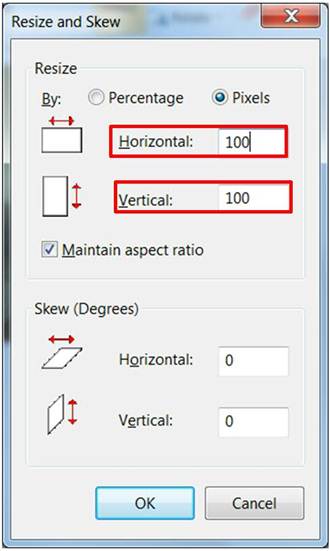
d. Increase or decrease width or height to get both measurements as close to 100x100 as possible. Changing one value may automatically calculate the other and you will not be allowed to change it. If your picture is not square, change the larger dimension to 100 and let the other dimension be automatically calculated.
e. Click ‘OK’.
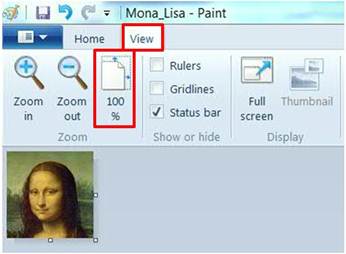
f. To review your picture, click the ‘View’ tab and the ‘100%’ button next to the ‘Zoom Out’ button. This is the true size of your picture.
5.
Save
your picture.
a. Click the pulldown menu just below the save button
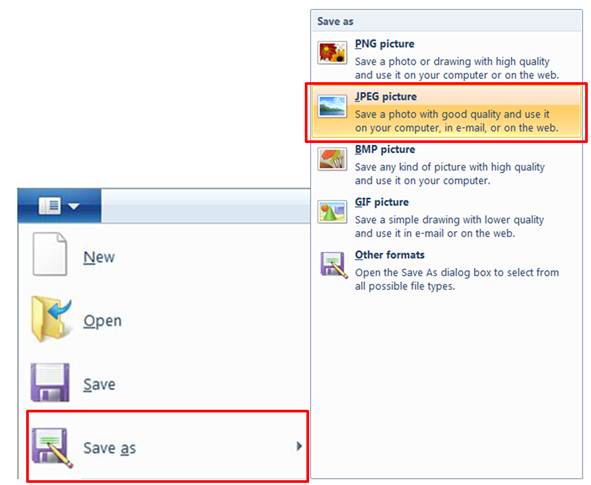
b. Select
‘Save As’, then click ‘JPEG picture’.
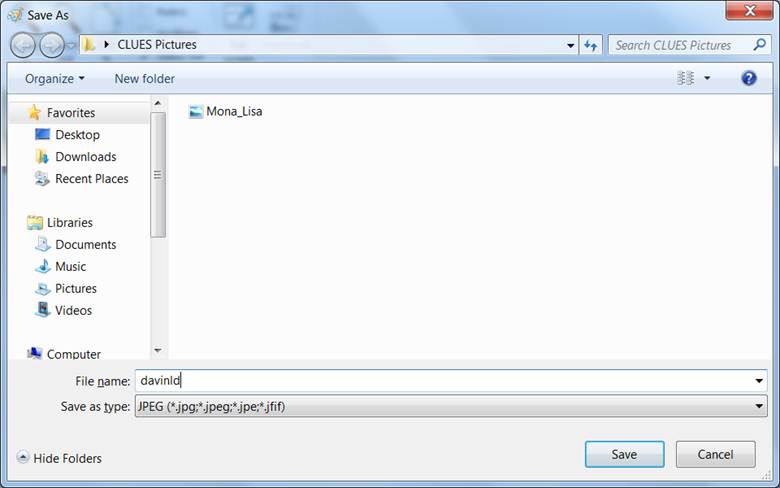
c. Use the navigation on the left hand side to browse to the folder to save your picture. Be sure it is in a location you will remember.
d. Use your Corporate Web Security ID or another name you will remember as the file name.
e. Make
sure ‘Save as type’ is set to ![]() .
.
f. Click ‘Save.’
Uploading your picture to CLUES
NOTE: Completing this process will replace any existing uploaded picture.
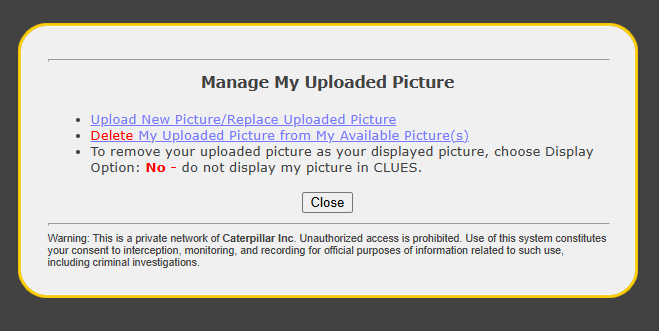
1. From the ‘Clues Self Service’ page, click ‘Manage My Picture Preferences ’ link, then click 'Manage My Available Pictures(s)' link.
2.
Click ‘Upload New Picture/Replace Uploaded Picture’
link.
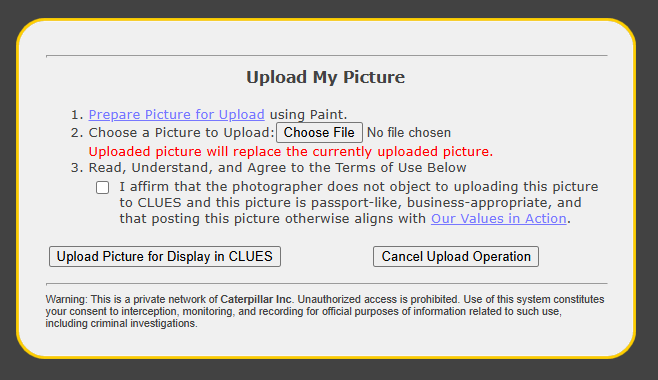
3.
Click on the ‘Choose File
’ button to open the window to find the picture file you created.
4.
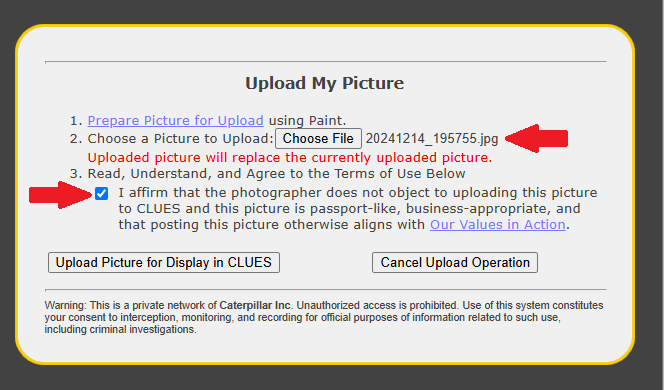
Select
the picture to be uploaded and click ‘Open’.
5.
Make certain that you have read and understand
the Terms of Use agreement. 6.
If you agree with the terms, check the box in
‘Step 3’ on the screen. If you do not
agree, click the ‘Cancel Upload
Operation’ button to end the operation.
Your picture will not be uploaded. 7.
Click ‘Upload
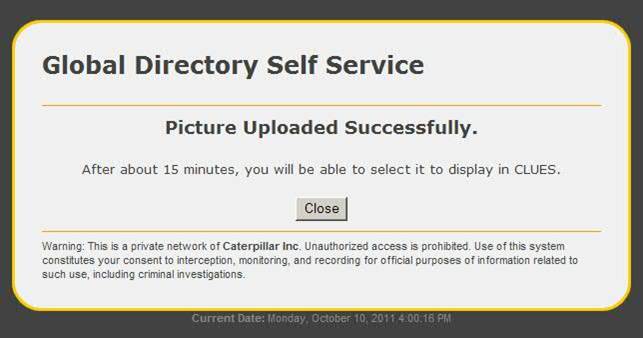
Picture for Display in CLUES’ to upload your picture. The ‘Picture Uploaded Successfully’ confirmation screen
displays. 8.
Click ‘Close’
to return to the Picture Manager page. Displaying your Picture in CLUES After
about 15 minutes, your uploaded picture should appear in My Available
Picture(s). If it does not, please
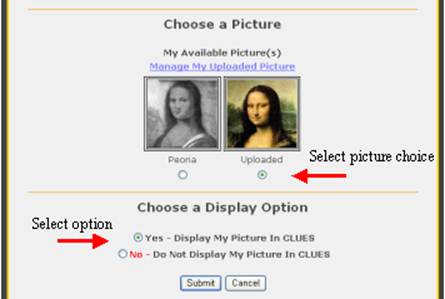
submit a ticket to the helpdesk. Displaying or Not Displaying your
picture in CLUES: 1. To
Display your picture in CLUES: a. Under
the ‘Choose A Picture Option’ section, choose the radio button below the
available picture you wish to display in CLUES b. Under
the ‘Choose a Display Option’ section, select the option ‘Yes – Display My
Picture In CLUES’. 2. To Not Display your picture in
CLUES/remove a displayed picture: a. In the ‘Choose a Display Option’
section, ensure the ‘No – Do Not Display My Picture In
CLUES’ option is selected. 3. Click ‘Submit’ to commit your changes. 4. Click
‘Cancel’ to cancel any changes
you have made. 5.
This will return you to the Self-Service screen
and the ‘My Displayed Picture’ section will reflect any changes you have made. 6. You
may continue to make changes to your Self Service information and click ‘Submit’ to commit those changes. If you do not wish to make any further
changes, you may exit the window and return to CLUES.